Adding Custom Music to Maps in Killing Floor

Originally Made by arramus

Here is a short and simple tutorial describing how to add default music to your maps. We are going to:

1. Add a KFMusicTrigger.

2. Configure the KFMusicTrigger with multiple Tracks.

3. Save your map and play test.

Follow these steps!

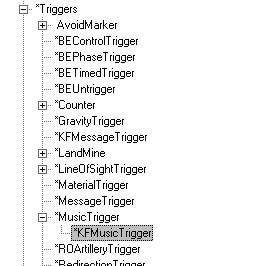
1. Open the Actor Classes Browser and select Actor > Triggers > MusicTriggers > KFMusicTrigger


Right click an area on your map in the 3D window to bring up the selection menu and click on Add KFMusicTrigger Here.


2. Double click on your KFMusicTrigger Actor to bring up its Properties and expand KFMusicTrigger and MusicTrigger menus.

Select the names of the default music tracks you want to use from the Killing Floor Music Folder, typically located here: C:\Program Files\Steam\steamapps\common\killingfloor\Music
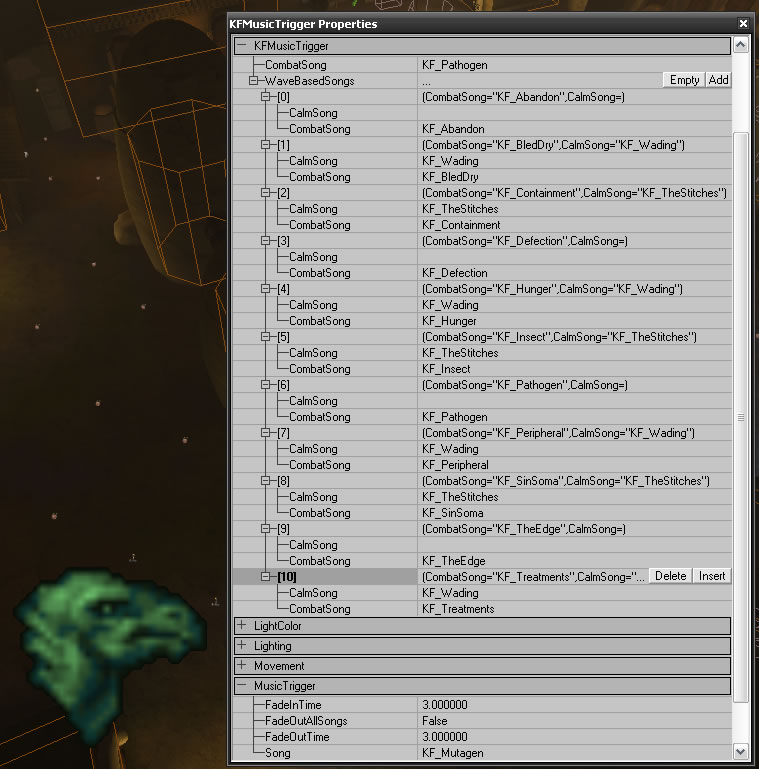
Default CombatSong
As the screenshot below shows, I selected KF_Pathogen as my default CombatSong. If only this area is filled in then you will hear that same music track repeatedly for each Combat Wave played in game.

WaveBasedSongs
In order to add extra variety you can assign a music track for multiple waves by selecting Add for WaveBasedSongs and manually typing in the name of the music track under its CombatSong. You can also assign a music track for the time players are visiting the Trader by typing in the name of the track under its CalmSong. I added 10 waves of music to my WaveBasedSongs. 10 for individual CombatSong and 2 CalmSong. Some of my CalmSong fields are left bland and at this stage a default music track will play. 

You do not need to add a preset music track for CalmSong but if you leave a CombatSong blank in the WaveBasedSongs then you will need to add a track in the main CombatSong to act as default.

MusicTrigger
Our last setting to make is under the MusicTrigger setting. I add the name of a music track to the Song area and left the rest at default. This music track will play in the final wave when you face the Patriarch as the Patriarch CombatSong.


3. Save your map and play test a few waves to hear multiple music tracks.

OrochiEditor and How to Use it!


OrochiEditor is a tool used to change stats in the game, like unlocking a character or how much experience one has, you can get the tool HERE

Tested on Warriors Orochi.

First you need to open your game, then OrochiEditor!


Once you opened both of them, i want you to press F6 on your keyboard, this will attach the editor to the game!


I'll explain how to unlock any character, the rest will be pretty self explanatory!


As you can see Lu Bu is locked.

Any character marked with an X is locked, to unlock you need to double click his name and mark 'Unlock Status' and then press CTRL+S to save your changes!


You can change his other stats if you feel like it.

Here is a before and after image to prove it works!


Here is a brief explanation on the other options inside OrochiEditor!

GLOBAL = Here you can change your Growth Points(EXP) 

ABILITIES = Not sure what it is =/

GENERAL = Your characters.

WEAPON = Weapons your chars have stored, you can give them the special weapon.

STAGE = Here you can change KO Count, etc...


[MUGEN]Starlight Fighters


Difficult:
HARD

Highly suggested that you play team mode against a single opponent, it's possible to beat the game without a partner but that would require a lot of practice.

Roster:

How To Install DOOM WADs?


In this tutorial i will teach on how to install WADs on DOOM!

First you will need a tool called ZDL(click here to download)

And of course you need IWADs , these are the core file to run the game(click here to download) 

You will need a Source Port too! Like ZDoom or GZDoom etc..

UNDERSTANDING SOURCE PORTS

ZDoom for example renders the game like the original while GZDoom renders in OpenGL , you can see the diffrence ingame when you look down or up , look at the pictures:

ZDoom
 GZDoom

Now that you know the diffrence click here to download ZDoom and here to GZDoom
(Note that i'm not hosting these files , if the links are dead just google it)

Install the SourcePorts and then Install ZDL , and make sure to place the IWADs somewhere you can remenber , i put them inside ZDoom folder


Now open ZDL , go to Settings and configure the IWADs / SourcePorts!


And that's it , here is the result!


Did this tutorial Helped You?

Yes
No

How to install Maps in GTA San Andreas


Map mods usually have the folder "data/maps/leveldes/" and the files seabed.ipl and seabed.ide

Just drag and drop these files into your GTA San Andreas folder(data/maps/leveldes/)

REMENBER TO BACKUP

And now the gta3.img , where we will add the map files , just open gta3.img with Alci's Editor and import the map files into it , for example i'm installing Luigi's Road and these are the file names!

luigi.txd
luigi.dff
luigi.col

And that's it , save gta3.img and play the game!

Here is an example of a map i installed using the method above!


Did this tutorial helped you?

Yes
No
Poll Maker

DMC4SE - Extracting .ARC Files


In this tutorial i will teach on how to extract the .ARC files from the game , you will need ARC Tool , onde downloaded extract it and open the folder.

Now go to your DMC4SE main folder and open this folder!

nativeDX10\rom\player\costume


I will extract Lady default costume as an example
(plmod_pl008)

Move the file to the Arc Tool folder , make a backup!


Move the .ARC to the pc-dc3se.bat and wait for it to unpack!


Once done this is what you will see!


Open the extracted folder and keep going until you get to this folder!


Now we will convert the .TEX files to .DDS , just drag and drop pl008_Lady_Body_BM.tex over ARCtool.exe , the textures are the files that end with "BM" , the other ones are shaders!

Onde done , the .DDS file will appear on your folder


Open the .DDS on Photoshop CS6!

You will need this plugin to work with .DDS on Photoshop CS6

Now to convert .DDS to .TEX just drag the .DDS file over ARCtool.exe , the .DDS wil stay there but don't worry!

Now we will save the .ARC file , again just drag plmod_pl008 folder and drop over pc-dmc4se.bat and you're good to go , the arc file is located in the same folder of ARCtool , this is what i could do following this steps!


Have a nice day!


Did this tutorial helped you?

Yes
No
Quotes to Know

Resident Evil 4 - Editando Áudio e Som

Read the english version of this tutorial HERE

Nesse tutorial vou te ensinar a editar qualquer som que esteja no RE4 , o formato dos arquivos são .OGG , eu recomendo usar o Vegas Pro 13 ou qualquer programa que converta mp3 para ogg! Você vai precisar do GCA Extractor para extrair o arquivo "ogg.dat" , nesse outro TUTORIAL eu explico como extrair arquivos!

Nós vamos substituir a música tema do Leon no modo mercenários por essa:

O nome da música que vamos substituir se chama st060.ogg , ela se encontra na pasta ogg\Bgm\BGM
(Eu tenho uma LISTA no meu fórum apontando qual áudio é qual)

Você tem que criar a mesma pasta na pasta do seu RE4!


Abra o Vegas Pro 13 e jogue sua música de escolha para a timeline!


Renderize o arquivo em formato .OGG
(Você também pode converter arquivos de áudio online ou com outro programa , eu só to mostrando meu método)

Feito isso , arraste o arquivo pra pasta ogg\Bgm\BGM que está dentro da pasta do seu RE4 e veja o resultado dentro do jogo!


Tenha um bom dia!

Esse tutorial te ajudou?

Sim
Não
My IQ Test